FREQUENTLY ASKED QUESTIONS
Brick Repair
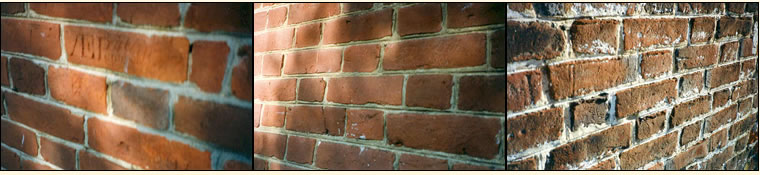
The process we recommend in the proper maintenance of exterior brickwork is to do as little intervention as possible regarding the original pointing mortar if a large majority of the mortar is still intact. A mason should replace only what is missing wholly, or eroded back more than 3/8″, with fresh mortar, which will match very closely to the original mortar in composition, color, texture, and tooling.
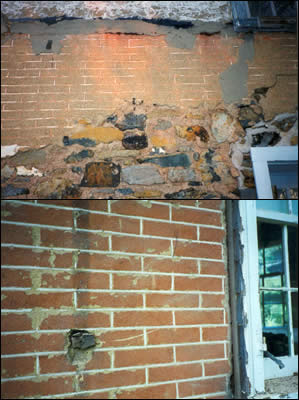
The total repointing of a building is often unwarranted. Patch pointing is cost-conservative as well as functionally superior to incorrectly repointing the whole building. It does take greater skill to do patch pointing (or what is also called “spot pointing”) because the areas that are repaired need to blend into the remaining original work and not be visually detracting thus making the whole repair appear as a patchwork quilt of mismatched spots. If total repointing is to be done because the majority of the mortar is past its useful service life, a mortar should never be applied that consists of Portland cement and fine sand paste placed over top of the existing joint. This technique employed by many masons is superficial because of a shallow depth to the material which lacks a “good mechanical key” needed to bond the mortar into the joints of the surrounding brick and stonework.
Over time a “scrub joint” or “lipstick pointing”, (as some terms it is often referred to), will delaminate. When a scrub joint does not delaminate because the mixing water was modified with a latex additive then the possibility of moisture being trapped behind the superficial Portland cement based pointing mortar is even greater. The extreme disservice of using a Portland cement based repointing mortar placed over the top of lime or clay/sand historic bedding mortar is that the Portland cement, which will pass through a #200 sieve, (a sieve where even a water droplet is not able to pass through), forces the wetting and drying cycles of the building, (a cause of masonry unit and mortar joint decay), to be heightened to occur more through the brick or stone face instead of through the mortar joint thus exacerbating the loss of more irreplaceable vintage brick and stone material.
The mortar joint is meant to be more sacrificial than the sometimes irreplaceable vintage masonry units. The “wicking-in” of water through the brick or stone joints past the cracks that form in Portland cement based mortars can then migrate into absorptive lime or clay/sand historic bedding mortar which may allow the moisture to be driven further into the building by blowing rainwater and attracted toward heated interiors which move the moisture toward the interior plaster and cause interior damage.
Using “sealers” on exterior historic masonry is a questionable intervention. Since all historic masonry walls, as well as the individual historic masonry units, need to “breathe”, (i.e. allow moisture vapor to escape), there should be a specific purpose in using some form of coating. Only after physical waterproofing via proper repointing and physical repair of damaged units should chemical “waterproofing” be considered. Those considered must have properties that maintain a high vapor transmission which will allow moisture to escape. The specific purposes for using a water repellent are:
- Inhibiting deterioration of the masonry units by not allowing the wetting/drying cycles, (the very cause of historic masonry failure over time), to occur through the unit or the joints. Although water repellents are not traditional historic material, they can act as a “sacrificial barrier” to be allowed to weather away from the action of the elements before more of the historic fabric weathers away. However, many conservative conservators will be wary of introducing a foreign material that will be absorbed deep into the pores of the masonry units. One reason is because it may not be reversible. If there is a fear that there could be a detrimental condition caused by the presence of the impregnated water repellent into the pores of the masonry units that could then pose an issue as time goes on this would be a reason to be cautious and not introduce that foreign material into the masonry. Atmospheric pollutants once cleaned off the masonry before repointing will occur again and absorb into the pores of the masonry trapping remnants of sealers in the units. This could result in negatively affecting breathability of the masonry units which causes another set of issues. These issues are on a micro scale but as we look at ancient structures still standing we can study what is working about them that helped them to last so long. We find that the correct type of pure lime mortars does help to aid in the long term conservation of the masonry structure. We find that all ancient structures were not sprayed with water repellents and sealers but when they have been they have been known to yellow in the case of waxes, some repellents break down with ultra-violet rays in the case of silicons, and possibly new generation silane/siloxanes may get trapped into the pores of masonry with unknown consequences. .
- As a grain strengthener, (surface consolidant/water repellent). A conservative way to get some water repellency and to maintain breathablility along with a slight bit of consolidation to friable brick and stone is the use of Waterglass in the form of Potassium Silicate. Waterglass must meet the US Federal TT-C-555B designation for a Coating for Interior and Exterior Masonry Surfaces (3.3.3) in regard to resistance against wind-driven rain, from which ASTM D 6940 has been derived. There are vendors that may sell variations of this but not adhere to meeting this standard.
- As an inhibitor to capillary action and the absorption of water into the building if the absorption of the brick is greater than the masonry’s ability to release the water back into the atmosphere before entering the building’s interior.
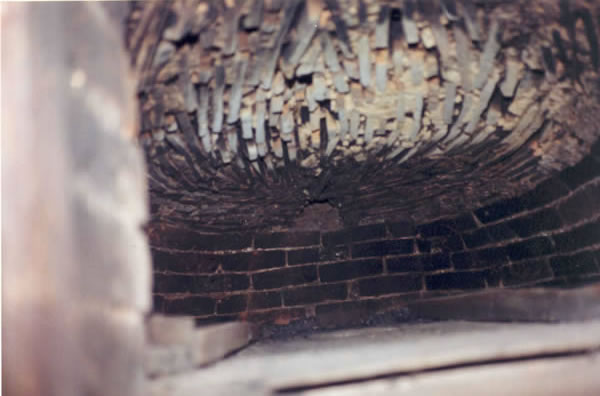
If there is moisture present at the gable end of a brick or stone building the roof system is working and the flashing system is working around any chimneys that extend past the roof line, the moisture may be due to condensation. A column of air that exists, in used or unused and capped-off tight chimneys, moves the expanded air through a natural draw upward and the moisture content in the air may be condensed by a change in pressure, (dew point), or thermal shock, (at the line where the air in the chimney goes through the roof). All masonry, wood, and building materials have an “R” value which means “restriction” to airflow. So a cap that seals a chimney does restrict airflow but does not eliminate it. It takes approximately 11 inches of masonry to equal the “R” value in 1 inch of wood to demonstrate an approximate value differential. Air that tries to move up and out but condenses near the top gets quickly absorbed into an unlined and capillary-filled brick masonry unit of the chimney. The plaster, the lime bedding mortar, and the soft salmon brick are highly absorptive.
The moisture problem is compounded when a high-efficiency gas or oil heating system pumps out an exhaust, into an uncapped/unlined chimney, that is practically nothing but hot air full of moisture and some unburned impurities. Even in the case of a lined chimney, the liner itself should be insulated on the outside of the liner within the walls of the chimney. The “salmon” un-vitrified center of the brick exfoliates onto the floor in the attic as salt crystals, (efflorescence), build up under the “fired skin” of the brick. Salt build-up jacks out the face of the brick and even the continually building up “salt skins” to finally hollow out the brick faces. The moisture wants to move toward the inner warmer attic instead of the colder temperatures outside of the building. Unused chimneys should be filled with free-flowing vermiculite masonry fill insulation and capped off at the top. Liners should be cast-in-place lightweight concrete which is creosote/acid resistant and insulative, or lined with stainless steel with an insulative blanket or vermiculite placed around the outside of the liner within the walls of the chimney chase. Unfortunately, even non-rusting stainless steel liners may deteriorate in time by acids in creosote-eating holes in the liner. The stainless option is less expensive at the front end of installation. The poured-in-place type is an excellent long-term value if installed properly.
Lime Products
Quick and short of it…. Make sure the sand meets ASTM C-144. But you might ask yourself, what the heck does that mean? ASTM C-144 is a standard specification for aggregate for masonry mortar and is produced by the American Society for Testing Materials (ASTM). To start off many people will use the term aggregate rather than sand. This is because aggregate is a broader term that can refer to recycled materials that can be used in lieu of sand if so desired. The specification has a lot of good guidelines to follow when choosing sand, such as cleanliness, shape, composition and grain size distribution.
Why Sand Is Important
Good, clean sand is important. Depending on where you, get sand you may run into some complications. If you’re purchasing your sand from a distributor, pre-bagged sands are very clean as they are typically washed and dried. However, bulk sand may have some impurities, it is unlikely but should be noted for other potential issues discussed in a moment. If you are getting sand from a nearby creek or stream for historical purposes, be careful. You should check with your local laws to see if it is even legal as there could be environmental implications. That being said, be sure that the sand is free of silt and organic matter.
Shape and Sharpness of Sand
The shape or sharpness of sand will help make a mix denser and create overall a more durable mortar. Angular aggregates fill in void spaces better then rounded sands. A good visual for this is to try and imagine a case of bottled water with round bottles, now imagine the same bottles but square. The square bottles will be tight against each other, while the round bottles only touch at four contact points, leaving voids.

Composition of aggregate will determine long term effects of the mortar. There are aggregates out there that can cause delayed expansion and failure of mortar. One to look out for is crushed dolomite limestone. There are others but for most restoration work that is the most common. Your local supplier should know if they carry this type and will most likely not recommend it for any masonry mortar.
Grain Size
Grain size distribution is the most important factor, when choosing an aggregate. The ideal sand should have a wide range to sizes in its composition. Workability and durability are greatly affected with good distribution. If you can gain access to a sieve analysis, look for a bell curve when the numbers are plotted on a graph. This shows that there are a few large pieces, an increasing amount of medium sizes and a small amount of fines or powder. Excess fines in a sand result in poor workability and is often corrected by an excess amount of water, resulting in poor durability.
Good sand that is clean and dry will have a theoretical void ratio of 33%. In other words, given a certain volume of sand there will be an ideal space of air of between the grain of 33% and 66% sand.
Fortunately there is a simple test anyone can do to see what the void ratio of sand is.
First get two clear containers one being at least twice the size of the other, fill the small container with water and pour it into the large container and make a mark. Then fill the small container again and pour it into the large container, being sure to have left the first measure of water in the container. Mark the level of the second measure and space 4 lines evenly between the two creating a total of six marks on the large container. Empty the large container and fill the small container with water. Pour the small container of water into the large container, reaching the bottom of the six lines. Now fill the dry small container with dry sand pour it into the large container. After everything settles you will be able to see how much water was displaced. Starting with the top line representing 0%, each line moving down the large container will represent 20%. The resulting percentage will be the void ratio and represent the minimum amount of lime by volume you should use to make a good mortar.
Poor sand can have ratios above 50% and will increase the amount of lime required thus resulting in added expense for you project. So when in doubt conduct a small test on the available sands choose the one that has a ratio closest to 33% to save on the amount of lime required and sleep easier knowing that you have decent sand.
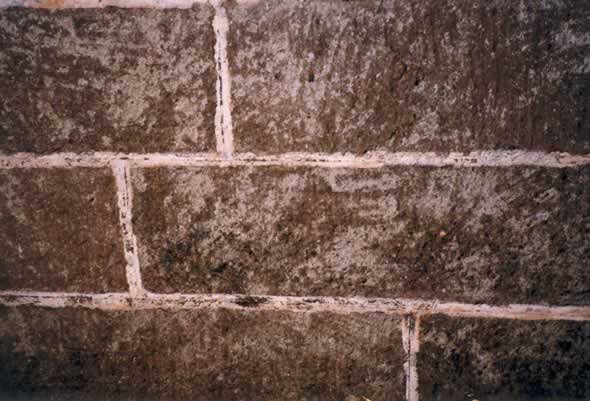
“Cement” was not produced in the United States until 1870 in Coplay, PA, only up until around 1910 was Portland cement starting to find its place in society as a masonry binder. Prior to 1910, most mortars used were based on either lime putty, Natural hydraulic quicklime, or natural cement. Regardless of what the exact mix design that was used to build your basement foundation, it would most likely be suitable for repointing your old stone basement foundation walls as it would be sympathetic to the adjacent mortar mix by maintaining good vapor permeability.
An easy way to determine if you have a lime based mortar, especially in stone construction, is to break a piece from the wall and visually inspect for any white nodules or specks. The white nodules are an indicator of what is called a “hot lime” mix and commonly found in stonework. Any presence of those nodules or specks suggests a high lime content mortar, and should thus be repaired with a comparable material.
Masonry Products
Silicate Dispersion Paint is also known as Inorganic Mineral Paints and is unique in regard to its ability to breathe and supply a long service life to masonry materials. Chemical mineral paints are based on “Waterglass” AKA Potassium Silicate, which has been described as liquid stone.
When silicate Paint petrifies a mineral substrate such as brick, stone or concrete, it chemically bonds to not only the surface but also beneath. Upon curing, called Silicification the paint becomes part of the substrate, forming a microcrystalline coating. Because silicate paint becomes one with the substrate it will mimic the natural water vapor transfer and cannot blister or peel due to the laws of chemistry.
Restoration
Is it for insulation? If the stucco over stone is an original and historically accurate detail, is it then OK to remove it to expose the stone and leave it that way? Will this enhance or deflate the value of the building in its authenticity?
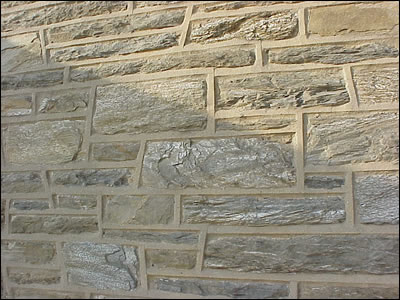
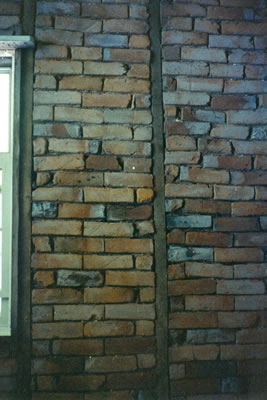
Traditionally the only exposed stone is one with a gauged mortar joint. “Free stonework” is irregular pieces of stone shaped to fit with large, squared cornerstones with alternating lengths used as borders. Ashlar works in varying sizes of cut blocks of stone laid in uniform coursing. You will sometimes see semi-coursed stonework on the front of a building and haphazard stone joinery on the sides and the back of the building. If the stone was shaped with tools used by masons it most likely was meant to be seen. You will often see remnants of the original external plaster or whitewash in the pours of the stone of the building which has already had the stucco removed to tip you off that the building was originally covered or coated and not exposed
Fieldstones are stones picked up off the field when settling property and preparing the ground for farming. They are laid up in “rubble work.” Some masons pronounce it “tool” work. I think they are just repeating the accent of the old-timers. Rubble is junk. Fieldstone is just junk stone. It is not dressed up in any way.
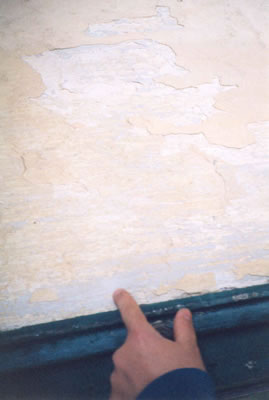
But the question remains, “Why did they cover the stone with exterior plaster?” Well, when you don’t gauge the joints and keep them tight, the surface exposure to the elements is increased and accelerates the erosion of the pointing mortar. This may quickly deteriorate the bedding mortar and the integrity of the wall. It will at least aid in the transmission of water into the building. So, the same soft, punky mortar that was used for bedding was also used for exterior plaster, (stucco), and finished off with a shelter coat of whitewash. Whitewash is pure calcium carbonate lime and water. It was used as a waterproofer and protecting coat for both beauty and function. Whitewash could be thought of as a coating like an eggshell. It is soft, and breathable and will protect the otherwise frail stucco render. Today the appearance of rubblework exposed is thought of as a thing of beauty. Historically fine stonework was squared and formal with straight, true, and gauged joinery as the sign of high-end work. It still is throughout the world, but “beauty is in the eye of the beholder.” If historic stone buildings were not plastered, (receiving an external stucco render), but instead received the inverted “v” joint to deflect the downward and angled drive of the rain, they usually were whitewashed right over top of the stone and joint rubble work. When you don’t see the whitewash over the stone anymore, it is because the acidity of a constant rainwater bath has loosened it and it has come off and was not renewed. More often than not it remains under the porch of houses and forebay areas of barns where it has been protected. Look closely at the pores of the stonework on the sides of the building and under the eaves or behind a pent roof to see if remnants of the stucco or whitewash remain. Another tell-tale sign that the building was originally stuccoed over the stone is that the widow trim remains proud of the stonework. If the trim comes out past the stonework at a thickness of 1-1’1/2″ past the stone, then that is indicative that the stone was covered with stucco the meet the outer edge of the wood trim.
The only insulation gained by exterior plaster is that of slowing a driving wind. Overall, masonry is a poor insulator. 1940 and newer stucco may have had perlite incorporated into the mix to add an insulative element.
To correctly restore something would mean to put it back to its original design. Correct architectural restoration of stucco over a stone building means that the plaster should remain and be finished as it was originally. However, many people with unsound exterior plaster, which has lost its bond to the substrate has cracks throughout it, or have flaking paint, consider the removal of the offending stucco and coatings without replacing it but rather exposing, cleaning, and repointing the stone. It is an option that will help mitigate the water infiltration problem. It is an option for overcoming the eyesore of flaking paint. It even increases the value of the building in many cases more than what the cost was to expose and repoint the stone. But my advice is to “just say no” when you have a formal exterior such as a building with a mansard roof. An exposed stone building that has been repointed and does not have the stucco or whitewash renewed should be reserved for a simple country farmhouse, outbuilding, or barn in my opinion. It may affect the value of the property negatively by removing historic details. A local historic appropriateness review board may not allow these modifications and a historical society may frown upon changing the unique and appropriate details originally found in the historic structure.
Why did they cover the stone with exterior plaster?
But the question remains, “Why did they cover the stone with exterior plaster?” Well, when you don’t gauge the joints and keep them tight the surface exposure to the elements is increased and accelerated the erosion of the pointing mortar. This may quickly deteriorated the bedding mortar and the integrity of the wall. It will at least aid in the transmission of water into the building. So, the same soft, punky mortar that was used for bedding was also used for exterior plaster, (stucco), and finished off with a shelter coat of whitewash.
What is Whitewash?
Whitewash is pure calcium carbonate lime and water. It was used as a waterproofer and protecting coat for both beauty and function. Whitewash could be thought of as a coating like an eggshell. It is soft, breathable and will protect the otherwise frail stucco render. Today the appearance of rubblework exposed is thought of as a thing of beauty. Historically fine stonework was squared and formal with straight, true and gauged joinery as the sign of high-end work. Really, it still is throughout the world, but “beauty is in the eye of the beholder.” If historic stone buildings where not plastered, (receiving an external stucco render), but instead received the inverted “v” joint to deflect the downward and angled drive of the rain, they usually were whitewashed right over top of the stone and joint in rubble work.
When you don’t see the whitewash over the stone
When you don’t see the whitewash over the stone anymore it is because the acidity of a constant rainwater bath has loosened it and it has come off and was not renewed. More often than not it remains under the porch of houses and forebay areas of barns where it has been protected. Look closely in the pours of the stonework on the sides of the building and under the eaves or behind pent roof to see it remnants of the stucco or whitewash has remained. Another tell-tale sign that the building was originally stuccoed over the stone is that the widow trim remains proud to the stonework. If the trim comes out past the stonework at a thickness of 1-1’1/2″ past the stone, then that is indicative that the stone was covered with stucco the meet the outer edge of the wood trim.
The only insulation gained by exterior plaster is that of slowing a driving wind. Overall masonry is a poor insulator. 1940 and newer stucco may have had perlite incorporated into the mix to add an insulatve element.
To correctly restore something would mean to put it back to its original design. For correct architectural restoration of a stucco over stone building means that the plaster should remain and be finished as it was originally. However, many people with unsound exterior plaster, which has lost its bond to the substrate or has cracks throughout it or has paint that is flaking, consider the removal of the offending stucco and coatings without replacing it but rather exposing, cleaning and repointing the stone. It is an option that will help mitigate the water infiltration problem. It is an option for overcoming the eyesore of flaking paint. It even increases the value of the building in many cases more than what the cost was to expose and repoint the stone. But my advise is to “just say no” when you have a formal exterior such as a building with a mansard roof.
An exposed stone building which has been repointed and does not have the stucco or whitewash renewed should be reserved for a simple country farmhouse, outbuilding or barn in my opinion. It may effect the value of the property in a negative way by removing historic details. A local historic appropriateness review board may not allow these modifications and a historical society may frown upon changing the unique and appropriate details originally found at the historic structure.
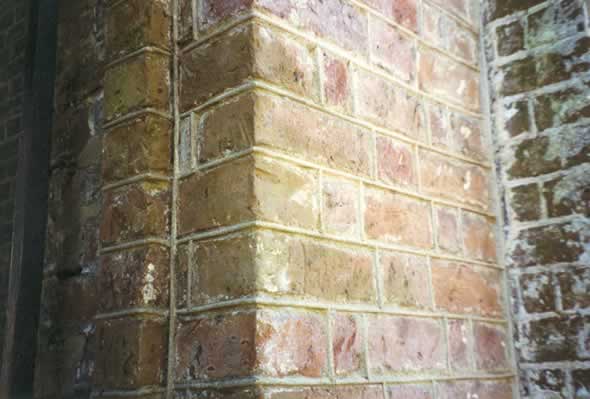
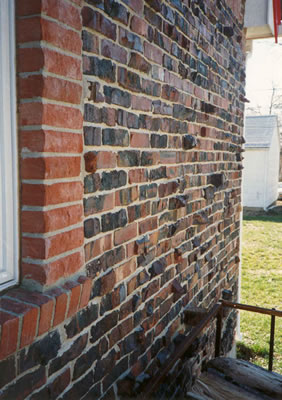
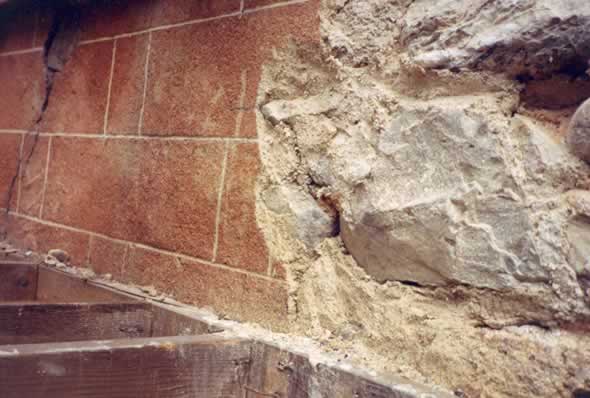
Correct total repointing requires removing the joints to a depth of approximately 2-1/2 times its width (only as a rule of thumb for standard sized brick joints). One goal of a complete repointing project is to ensure that the replacement mortar maintains a good three-sided adhesion of the new mortar into the open joint to secure a positive “keying-in” of the mortar to bond within the rebate and create a durable and long lasting repair.
The second and more important goal is that the replacement mortar is designed to have a similar liquid and vapor transmission rate as that of the bedding mortar so that the wetting and drying cycles of the building are encouraged to occur through the joint and not through the face of the brick and stone. Using an in-kind and compatible repointing mortar that will not exceed the compressive strength of the brick or stone is key. The cured mortar used (which should have published results in what to expect for final measured strength in pounds per square inch (p.s.i.) ), should not be harder than the masonry units. When the p.s.i goes up for the mortar what correlates is how dense the mortar becomes and with that increased densification follows the condition of the mortar not being breathable.
The repointing mortar should be compatible with the remaining back-up bedding mortar by having a similar liquid and vapor transmission rate so that the wetting and drying cycles are encouraged to go through the joint and not the face of the brick and stone. Pure lime binder pointing mortar is compatible with the soft and absorptive nature of historic brick which fully relies on their frail and aged “fired skin” to protect themselves and the building from rain intrusion and the accelerated degradation of the soft salmon-colored center of the brick. If high concentrations of Portland cement were in the repointing mortar instead of the repointing mortar being made of the proper type of pure lime binder, when moisture in the brick were to expand and contract during freeze/thaw cycles, the unyielding mortar will force the softer face of the brick to exfoliate and come off thus leaving a vulnerable unburned “salmon” center of the brick exposed to the elements.
Invasive cleaning methods such as sandblasting or high-pressure washing should be a questionable intervention upon the historic fabric of any kind and should be considered carefully. Quartzite sand should never be the medium used on historic brick whose frail “fired skin” will be destroyed and thus expose a porous “salmon” center.
Never sandblast sand upon any stone with intricate carvings or upon a terra cotta unit whose glazing would be irreversibly removed. Other media is available such as ground-up walnut shells, baking soda, diatomaceous clays, and glass beads. Which media is to be used is to be judged on their effectiveness using the most non-invasive method first. The non-invasive method is the one that works upon the historic substrate to lift only the undesirable contaminant.
One could employ quartzite sand, (in varying gradation and at various p.s.i. pressure), when there is a sacrificial element allowance and need for aggressive cutting is desired, such as in the case of removing tenaciously adhered Portland cement staining from a poor repointing job or from a cementitious whitewash when the substrate is common fieldstone that has no intricate carving. Modern brick will lack the porous “salmon” center known to be the remaining condition of an historic brick fired in a down-draft kiln.
Modern bricks are thoroughly fired in a tunnel kiln which results in more uniform densification throughout. But even modern brick will become “pitted” by the sharp sand action of a sandblaster. If any case where all the drawbacks and limitations are realized and anticipated beforehand still warrants the use of sand as the medium, this method is at your disposal if a test sample proves it is effective. However, be sure of this fact. The surface area of masonry which is exposed to the elements is increased once sandblasted and micro-cracks may be introduced by any violently aggressive sandblasting, especially by inexperienced operators.
A final drawback of the use of this already unpopular method is that silica dust will be produced. At least a water mist used as a knockdown to dust must be engineered into the application. Water greatly reduces the dust when the sand comes out of the orifice and is pulverized into dust upon impact.
A vacuum sandblaster is used when one must collect all of the contaminant such as paint along with the sand. Some municipalities do not allow sandblasting of any kind because of the negligence and misuse of the tool and because of the irreversible damage caused to historic structures.
Not allowing sandblasting is generally a good idea since more damage is done than good overall. Should you let him sandblast? Most probably not.

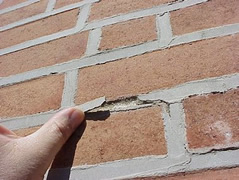
Surface pointing, (also known as a “scrub joint” ) is commonly applied as a pasted joint with little depth of material. It is the most common method of “repointing” a whole building but contributes very little. Many times this method accelerates deterioration by trapping water in the wall with high concentrations of Portland cement in the mix used.
Many masons utilize this method because pasting over the top of slightly recessed joints with a thin overlay goes up very quickly and gives the appearance of a lot of work completed for what is a small amount of money charged for the work. In the end, the less-than-savvy building owner may think that since the entire wall has been “repointed” and now has a uniform look with all of the joints filled they have received a good value.
What has happened is that the joint profile is not restored to tooling within the edges of the brickwork but instead is a flat joint on the faces of the brickwork.
The fineness of Portland cement and fine play sand made in a 1:1 ratio with little or no lime content is often what is used to make this fine paste. The brittle, often gray Portland cement-colored, scrub joint cracks and falls out within a few years.
Where the scrub joint does not fall out and is filled into deeper voids it only helps to keep moisture trapped in the bedding mortar. This allows any moisture in the wall to escape through the face of the masonry unit if it were to get out at all. A resulting “picture frame” of proud gray mortar remains with hollowed-back masonry units as the final irreversible damage. “Tuckpointing” is what some inappropriately call the scrub joint. The scrub joint is very similar to grouting the face of tile although the scrub joint is applied course by course on the brick joints. The actual root of the name “Tuckpointing” comes from a narrow keyway cut into the center of a molded brick joint and then filled or “tucked” with a bright white, red, or black lime putty to give a more formal and gauged appearance to the brickwork.
Before the tucking in of this lime putty a red color wash used to be applied first to the bricks and to the background mortar joints to give uniformity and aid as a shelter coat. Remnants of this color wash and infill of putty can be found on many historic brick buildings in the eastern states. The “grapevine joint” has taken the place of the name of a true ruled-key tuck-pointed joint in my opinion. The grapevine joint is often reproduced in a restoration effort without the proper color wash and lime putty in-fill. This is a side note but shows that hastily going into repointing can result anywhere from improper working dynamics to a wholesale misinterpretation of the original design detail which alters the historic accuracy of the building in its setting.
Reusing old historic mortar is possible in more ways than one. The first methodology would be to leave sound mortar alone and keep using it for as long as possible, only doing “patch” pointing in areas that need to be fixed. In cases where a building owner desires to repoint the whole building you can follow the backyard guidelines below.
Of course if one were to follow these guidelines then there must be a conservation mindset in the back of their head. Knowing this, a mortar analysis would be highly recommended to help conclude an appropriate mortar mix design.
Reconstitution of historic lime mortar and renders
The purpose of this procedure is to separate the lime from the historic aggregates to reproduce a mortar joint or render while retaining as much of a buildings historic fabric as possible without the use of acids.
Beginning with the removal of any loose, cracked or friable render or mortar in the gentlest means possible, put debris aside.
Using a concrete barrel mixer place all saved debris in the mixer with large heavy stones or steel balls, about the size of a bowling ball. Make sure that the chosen crushing medium is harder than the debris to minimize contamination of the crushed aggregate by foreign matter. The mixer should be filled only to the point where the crushing medium will effectively fall from the apex of the mixing rotation and crush the debris to what would be the consistency of a pre-blended dry bagged mortar. This process should take anywhere from 20 – 60 minutes depending the quantity of the material loaded in the mixer (less is faster) and the desired fineness of the aggregates. Be sure not to over mix. Over mixing will result in the deformation of the aggregate.
Once the debris has been crushed to the desired particle size, place in 5-gallon pails or wheelbarrow for the separation process.
Place the end of a hose running water beneath the crushed aggregate. While the container is filling with water be sure to slowly agitate the wet aggregate mix with a hoe or trowel. Be sure to allow the fine lime particles to spill over the sides of container to be discarded. Make sure that the larger aggregate stays settled to bottom of the container for reclamation. This process should take approximately 20-60 minutes depending on amount of crushed debris and its binder to aggregate ratio. The process is completed when the water runs fairly clear and the remaining fines in the mixture can be easily made into a ball that resembles saturated beach sand.
Upon completion of filtering the lime from the aggregate allow to dry in the open air and strong sun by spreading it out on as thinly as possible over a tarp.
Once the aggregates are dry, the large particles of broken stone, any other foreign matter and large unbroken debris can be dry screened out using the desired sieve size. Typically anything retained on a #4 sieve can be discarded.
Now that the aggregate is dried and sieved, new mortar formulations can commence. Depending on the amount of work to be done with the reclaimed aggregate and the amount that was actually reclaimed, determination of how much other similar aggregate is to be gauged in to the new repointing or rendering mix.
Click for information on our Ecologic™ Mortar
Using the modern grapevine jointer in brickwork is a form of what is also called “bastard pointing” whereby the genuine article that is being attempted to be copied is the ruled key and tuck point where the bed mortar receives a keyway into the first infill and then later tucked with usually a white or red colored lime putty. This “tuckpointing” was done to give a more formal, (gauged) appearance to a hand-molded and irregularly sized brick or irregular rubble, and a snecked rubble, stone wall. Bastard pointing in stonework is found in the forms of Ruled Ribbon jointing and further by Cobweb Ribbon jointing in both cases by the Raised Ribbon where material is added or raised to the base infill and not into a keyway first incised. It is also found in the form of Painted Ribbon where whitewash is used for the painted highlight lines in white, graphite black, etc. to create contrast.
Penciling on both brick and stone joints is a form of trompe l’oeil where these colored limes are painted in straight thin lines on the joint. It is a faux finish to what originally was genuinely designed to have depth and body to an infill material that would last longer as it wore away. New (colonial style) brick buildings, and reproductions of the same at historic sites, often get what is also called a Colonial style “grapevine jointing” the brickwork. This style is often copied from the original buildings in which the remnant of the style hardly remains evident regarding the in-fill of colored lime putty. It is often by an oversight, or by a new interpretation of only what is desired from what remains of the original style that the contrasting infill is not included in the new work. This oversight has happened to the degree that a new style all its own has been created, AKA the grapevine jointing in brickwork. Thus, now all repointing is often generically referred to as tuck pointing from the original meaning to tuck in the colored putty within the center of an incised joint. The grapevine joint in brickwork is now made with a jointer which makes a center impression that is close to straight, but not at all as straight as when using a rule to guide the impression. In nature, a real grapevine would only normally grow in straight lines or be incised if you are pulling a grapevine out of a building’s mortar. Therefore it is just the grapevine joint in stonework that remains true to its name as a convex protrusion. In brickwork, the grapevine joint is a style of modern times. In brickwork, a convex protrusion is called a beaded joint.
|
A very authentic historic style of pointing whereby a squared appearance is given to snecked rubble work is the Overhung Ridge joint. Snecked rubble is stonework cut in semi-squared blocks of stone laid in level, uniform coursing. Snecked rubble is sometimes wrongly referred to as Ashlar’s work. Ashlar work is perfectly squared blocks of stone, whether they be squares or rectangles, with very tight, (usually less than ¼) joinery. The Overhung Ridge joint is often misinterpreted as one of the ribbon joints mentioned above. Overhung Ridge is a joint that meets the flush face of the semi-squared block of stone above it, having a trailing edge to the stone above it and a ruled edge with an inward bevel meeting the stone below it. Usually, the left side of the head joint has the trailing edge, and the right side of the head joint has the ruled edge with bevel. Ecologic™ Mortar G #DGM 250 (greenish ochre-brown colored) Tools- 1/2″ ribbon jointer, loop and a level |
Note that often in Overhung Ridge pointing of snecked rubble stonework, the head joints can be perfectly perpendicular with the horizontally level bed joints, or the head joints are angled from the level bedding plane. From a distance, this joint appears to make the semi-squared stones seem more squarely shaped. It also makes the joints look a lot like a ribbon joint, which they are not. Although no painted lime lines or additional material is added on the surface of the ruled lines, the tightly compressed flat area of the Overhung Ridge joint typically dries lighter than the trailing and ruled edge which is scraped away to bleed into the surrounding texture of stone. This gives the appearance of a painted ribbon joint but this is not to say that in some instances pencilling was not still carried out. In Chestnut Hill, Philadelphia many original Overhung Ridge pointed buildings throughout Germantown Avenue and all the surrounding side streets can still be viewed.
Beveled Ridge is also known in various areas as a Beveled Ridge, Colonial Ridge, Inverted-V, V, Beaked, Peaked, Prism, Crown Ridge, or as a Pointed joint along with other regional terms for the same thing. The term for placing mortar between any irregularly shaped stone or brick where the mortared sides of the squared unit and/or bed were not first buttered with mortar and then dipped onto its bed is called pointing or it is called repointing when it is renewed. A pointed joint, which comes to a peak in the center best describes the most functional shape for mortar placed between irregularly-sized, randomly laid rubble stonework because the protrusion of the mortar allows for more material to be weathered away than any joint that is struck back. It also happens that rain coming at an angle toward the building would deflect away from the wall when the force of the rain hits a beveled edge and bounces away. Finally, in randomly laid rubble stonework where the mosaic-like pieces of stone come together to form one unified wall, a hand-struck Beveled Ridge joint follows the contours of the stones’ joinery. This allows the size of each level to conform with the opening that it fills. This is aesthetically pleasing and is further improved in aesthetic quality when sunlight casts shadows on the lower half of the bevel making wide joints appear half their size. So, the terms Pointing and to Repoint may have remained because of the shape that mortar for this type of stonework was originally designed to have.
 |
Surface pointing, (also known as a “scrub joint” ) is commonly applied as a pasted joint with little depth of material. It is in fact the most common method of “repointing” a whole building but contributes very little. In fact many times this method accelerates deterioration by trapping water in the wall with high concentrations of Portland cement in the mix used.
Many “Restoration masons” utilize this method because pasting over the top of slightly recessed joints with a thin overlay goes up very quickly and gives the appearance of a lot of work received for what is a small amount of money charged for the work. In the end, the less savvy building owner thinks that since the entire wall has been “repointed” and the uniform look of all joints being filled is a complete job they received a good value. What actually has happened is that the joint profile is not restored to a tooling within the edges of the brickwork but instead is now a flat joint on the faces of the brickwork much wider than the original joint profile. The fineness of Portland cement and fine play sand made in a 1:1 ratio with little or no lime content is what makes this fine paste. The brittle, often gray Portland cement colored, scrub joint cracks and falls out within a few years. Where it does not fall out and was filled into deeper voids it helps to keep moisture trapped in the bedding mortar and only allows any moisture in the wall to escape through the face of the masonry unit, if it were to get out at all. A resulting “picture frame” of proud gray mortar remains with hollowed back masonry units as the final irreversible damage. “Tuck pointing” is what some inappropriately call the scrub joint. The scrub joint is very similar to grouting the face of tile although the scrub joint is applied course by course on the brick joints. The actual root of the name “Tuck pointing” comes from a narrow keyway cut into the center of a molded brick joint and then filled or “tucked” with a bright white, red or black lime putty to give a more formal and gauged appearance to the brickwork. Prior to the tucking in of this lime putty a red color wash is first applied to the bricks and mortar joints to give uniformity and aid as a shelter coat. Remnants of this color wash and infill of putty can be found on many historic brick buildings in the eastern states. The “grapevine joint” has taken the place for the name of a true ruled key and tucked joint and what is often reproduced in a restoration effort is simply the grapevine joint without the proper color wash and lime putty in-fill. |

 |
 |

Moisture that is seen in the masonry walls at the first and second-floor level when it has been determined that no plumbing is leaking within the wall, or improper pointing, flashing, or cracks are apparent on the outside, may be due to various causes.
- “Rising damp” originating from earth sloped toward the building instead of graded to lead water away may sometimes absorb into the mortar or stucco. To correct this, the grade should be sloped away from the building. Heat from the baseboard units pull the air containing water toward itself too. This is apparent when plaster crumbles near the baseboard of the first floor or above the baseboard heating unit. A full damproof course of low absorptive masonry such as terra cotta tile can be installed to arrest this condition. Below grade, it has been a traditional building technique to parge coats of external plaster on the foundation and coat the parging with tallow, (animal fat). Dig down along that side of the house and after a parge coat of 1 part NHL 5 and 1 part sand apply a bituminous foundation coat to seal out moisture. Consider the use of a sheet drain which leads to a french drain tile. Finally, remember to grade away from the building and remove loose fill that causes drainage against the building. Instead, use a less percolating soil that allows water to be shed off.
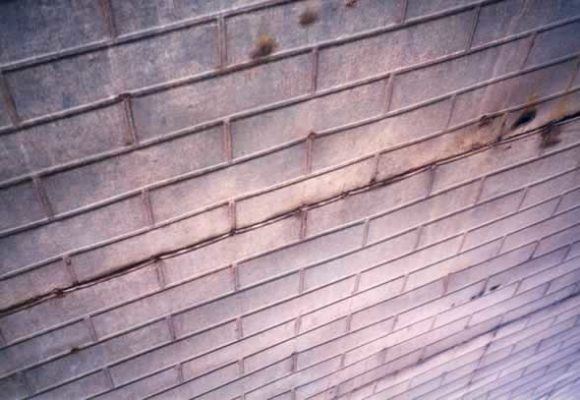
- There are unused flues built directly into the thickness of solid brick or stone walls that need to be filled with vermiculite or if used, properly lined. Sometimes you will see an accelerated decay of the brick faces and joints where the hidden chimney within the wall is located. If a high-efficiency heater is installed without a liner in these hidden chimneys, you may see old creosote being carried through the brick or stone wall by the catalyst of condensed water from the efficient heater to the outside face of the wall. This often leaves a brownish streak coming down the wall. The correction is to properly line the chimney with an insulative liner.
- The moisture content in the room or an adjoining room/basement is great and requires proper ventilation. Often rooms in older houses are tightened up with thermal windows and further power-cooled. They should be equally power-ventilated and not rely on ridge, soffit, or unbalanced venting methods. Natural venting ports in basements are sometimes closed off. This modification sometimes changes the dynamics of the original design for proper ventilation.
- When northeast driving rains push against a wall that was recently repointed or re-stuccoed in Portland cement-based material the result is often a water infiltration into the building’s bedding mortar. You may see a “water-logged” look to the exterior masonry. The moisture gets caught up in the punky, loose, and absorptive bedding mortar in the deep mass-masonry wall and can’t get out. The answer is not to replace the bedding mortar. The answer is to re-repoint or remove and re-stucco the exterior with the correct lime/sand mortar and stucco to return to the appropriate breathability of the historic system.